LED Mirror at Square Design
This past Fall I had the pleasure of working with the folks at Square Design, a custom design and fabrication business in lovely Gowanus, Brooklyn. In the course of that project, I programmed a series of NeoPixel strips to light in patterns evoking (as opposed to simulating) rainfall. That project was so much fun that they decided to do something special for their annual holiday party: an LED mirror!
Physical Design and Setup
The basic idea behind the LED mirror is simple: connect a camera to a small computer that then projects what the camera sees on a grid of NeoPixels. We had discussed using a Raspberry Pi to control the system; other projects – such as this modern take on Three’s Company-era door beads – convinced us that the premise was viable. This design incorporates 32 NeoPixel strips with 48 pixels per strip. Each of four groups of eight strips is controlled by a single FadeCandy board, which is pretty much a NeoPixel-dedicated microcontroller with a USB interface. The FadeCandy boards in turn are controlled by a Raspberry Pi model B+.
Connecting the pi to the camera and the FadeCandy boards would be simple, as they all interface over USB. However, since we wanted to connect at least 5 peripherals to the pi, a USB hub would be needed, both to accommodate the number of peripherals and supply power. The pi, after all, can supply only a small current over its USB ports, and it is almost always recommended to find a separate power source for peripherals.
More significantly, the NeoPixel strips would require a separate power supply. As discussed in the door beads project referenced above, each NeoPixel draws about 60mA of power at 5V. We specified a 32×48 grid of NeoPixels, which comes to 384 total. Therefore, the strips could draw about 23A total – an amount well beyond that available over USB.
The strips themselves had to be mounted on a board and soldered to buses in groups of 8. Then, each bus was soldered to a FadeCandy board as in the examples here and here.
By the time I arrived, the Square Design team had already completed most of the construction of the physical components of the mirror. As the pictures below show, they did a tremendous job in a very short period of time! Although I would have liked to poke around with a multitester and get a better feel for how their implementation differed from the examples above, we only had 3 days to finish the whole project, so I had to get right to work on the rest of the system. Easy!

The mirror’s front, once the electronics were mostly in place. The software was obviously not in place.
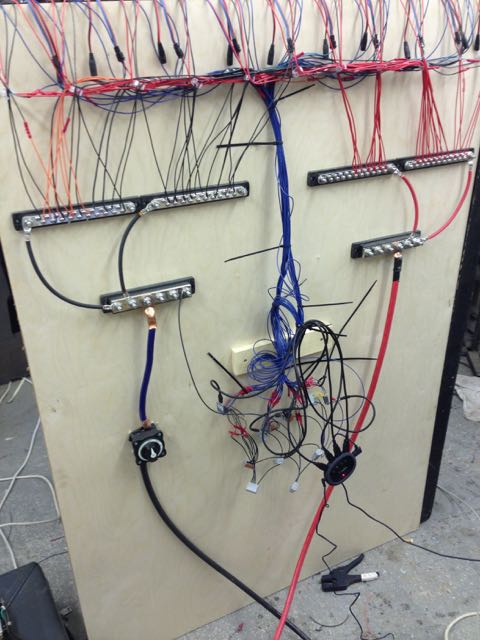
The mirror’s back showing the NeoPixel/FadeCandy wiring. “Just don’t touch anything, and you’ll probably be OK.”
Thus, the design consisted of the following physical components:
- Raspberry Pi
- USB Camera
- Powered 4-port USB hub
- FadeCandy boards
- Neopixel grid
- 5V Power supply
After deciding to use Raspberry Pi, NeoPixels and FadeCandy boards, there was not much hardware left to spec. We chose a Raspberry Pi-compatible Creative Live! camera off this list (I’ll update with the model number shortly) and a Belkin F5U234V1 USB hub. For power, the SD folks acquired a refurbished supply capable of powering a mad scientist’s lab, or at least Slayer’s backline.
The Software
Design
For the pi’s operating system, I wanted to stay on familiar ground, given the tight deadline. Raspbian-wheezy is a great general-purpose distribution that, as described below, simplifies the process of installing standard software. That said, prior experience with Linux is very helpful.
FadeCandy comes with a suite of software that includes a server and a example clients in a variety of environments, including python, JavaScript and Java. And by “comes with,” I mean it’s available on GitHub. The universe of potential clients is not limited to those included in the examples, because FadeCandy takes a client-server approach that uses the Open Pixel Control protocol over standard sockets. Therefore, one could implement an OPC client in an arbitrary language.
OpenCV provides a stable and relatively well-documented interface for image acquisition and processing. As a bonus, it’s available as a raspbian package.
As for programming environment, I wanted something familiar and easily debuggable, so I chose Python. (Given the opportunity, I just might try this in Ruby next time.)
Setup
A Raspberry Pi running raspbian-wheezy presents as a nice, conventional Debian Linux machine. Although the Pi may be destined to become a server accessed only via a network, it is easiest to begin with a display connected to the HDMI port and a keyboard and mouse plugged in to the USB ports, of which the B+ models have four. This lets you watch the base system boot and check for hardware errors, etc. So, we initially set up our pi away from the mirror where we had monitors, power, and ethernet.
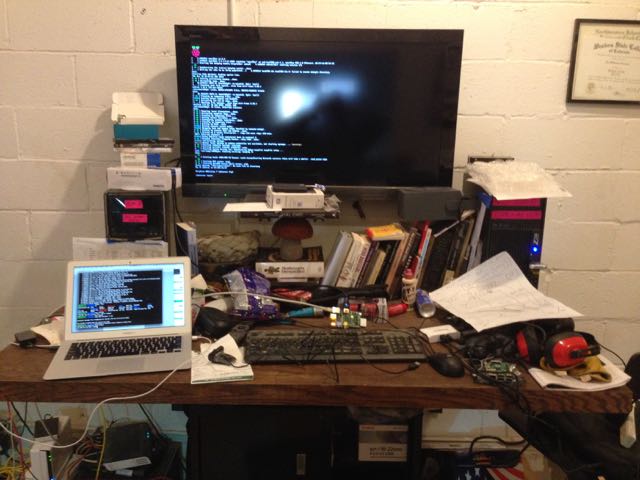
The Raspberry Pi setup workstation. Note the ear protection on the right. Because workplace safety.
After the pi was connected as described above, we copied the raspbian-wheezy image to a Micro SSD, inserted it in the pi, and it booted right up without incident.
As with other Debian-based systems, one installs most software on the pi via apt-get or, for a nicer console-based user experience, aptitude.
In sum, the basic packages required to get off the ground are:
- python
- opencv-dev
- numpy (installed with pip or easy_install)
The Code
The code, which is by no means perfect, had to perform the following:
- capture an image from the camera,
- resize it to the mirror’s dimensions,
- transform it otherwise to meet FadeCandy/NeoPixel requirements, and
- send the data to the FadeCandy driver software.
This boiled down to the following:
MIRROR_COLS = 32
MIRROR_ROWS = 48

while(True):
  # Capture a frame
  ret, frame = cap.read()

  reducedFrame = cv2.resize(frame, (MIRROR_COLS, MIRROR_ROWS))
  # Flip y-axis to match mirror's setup
  reducedFrame = reducedFrame[:, ::-1]

  # Rotate color bytes from BGR format to RGB
 reducedFrame = np.roll(reducedFrame, 2, axis=2)

  # The Neopixel grid is addressed as a 2-dmensional array, so
  # reshape the data to match
  ledArray = np.reshape(reducedFrame, (reducedFrame.shape[0] *  reducedFrame.shape[1], 3), 'F')

  # Send it on to the FadeCandy controller
  client.put_pixels(ledArray)
  time.sleep(0.1)
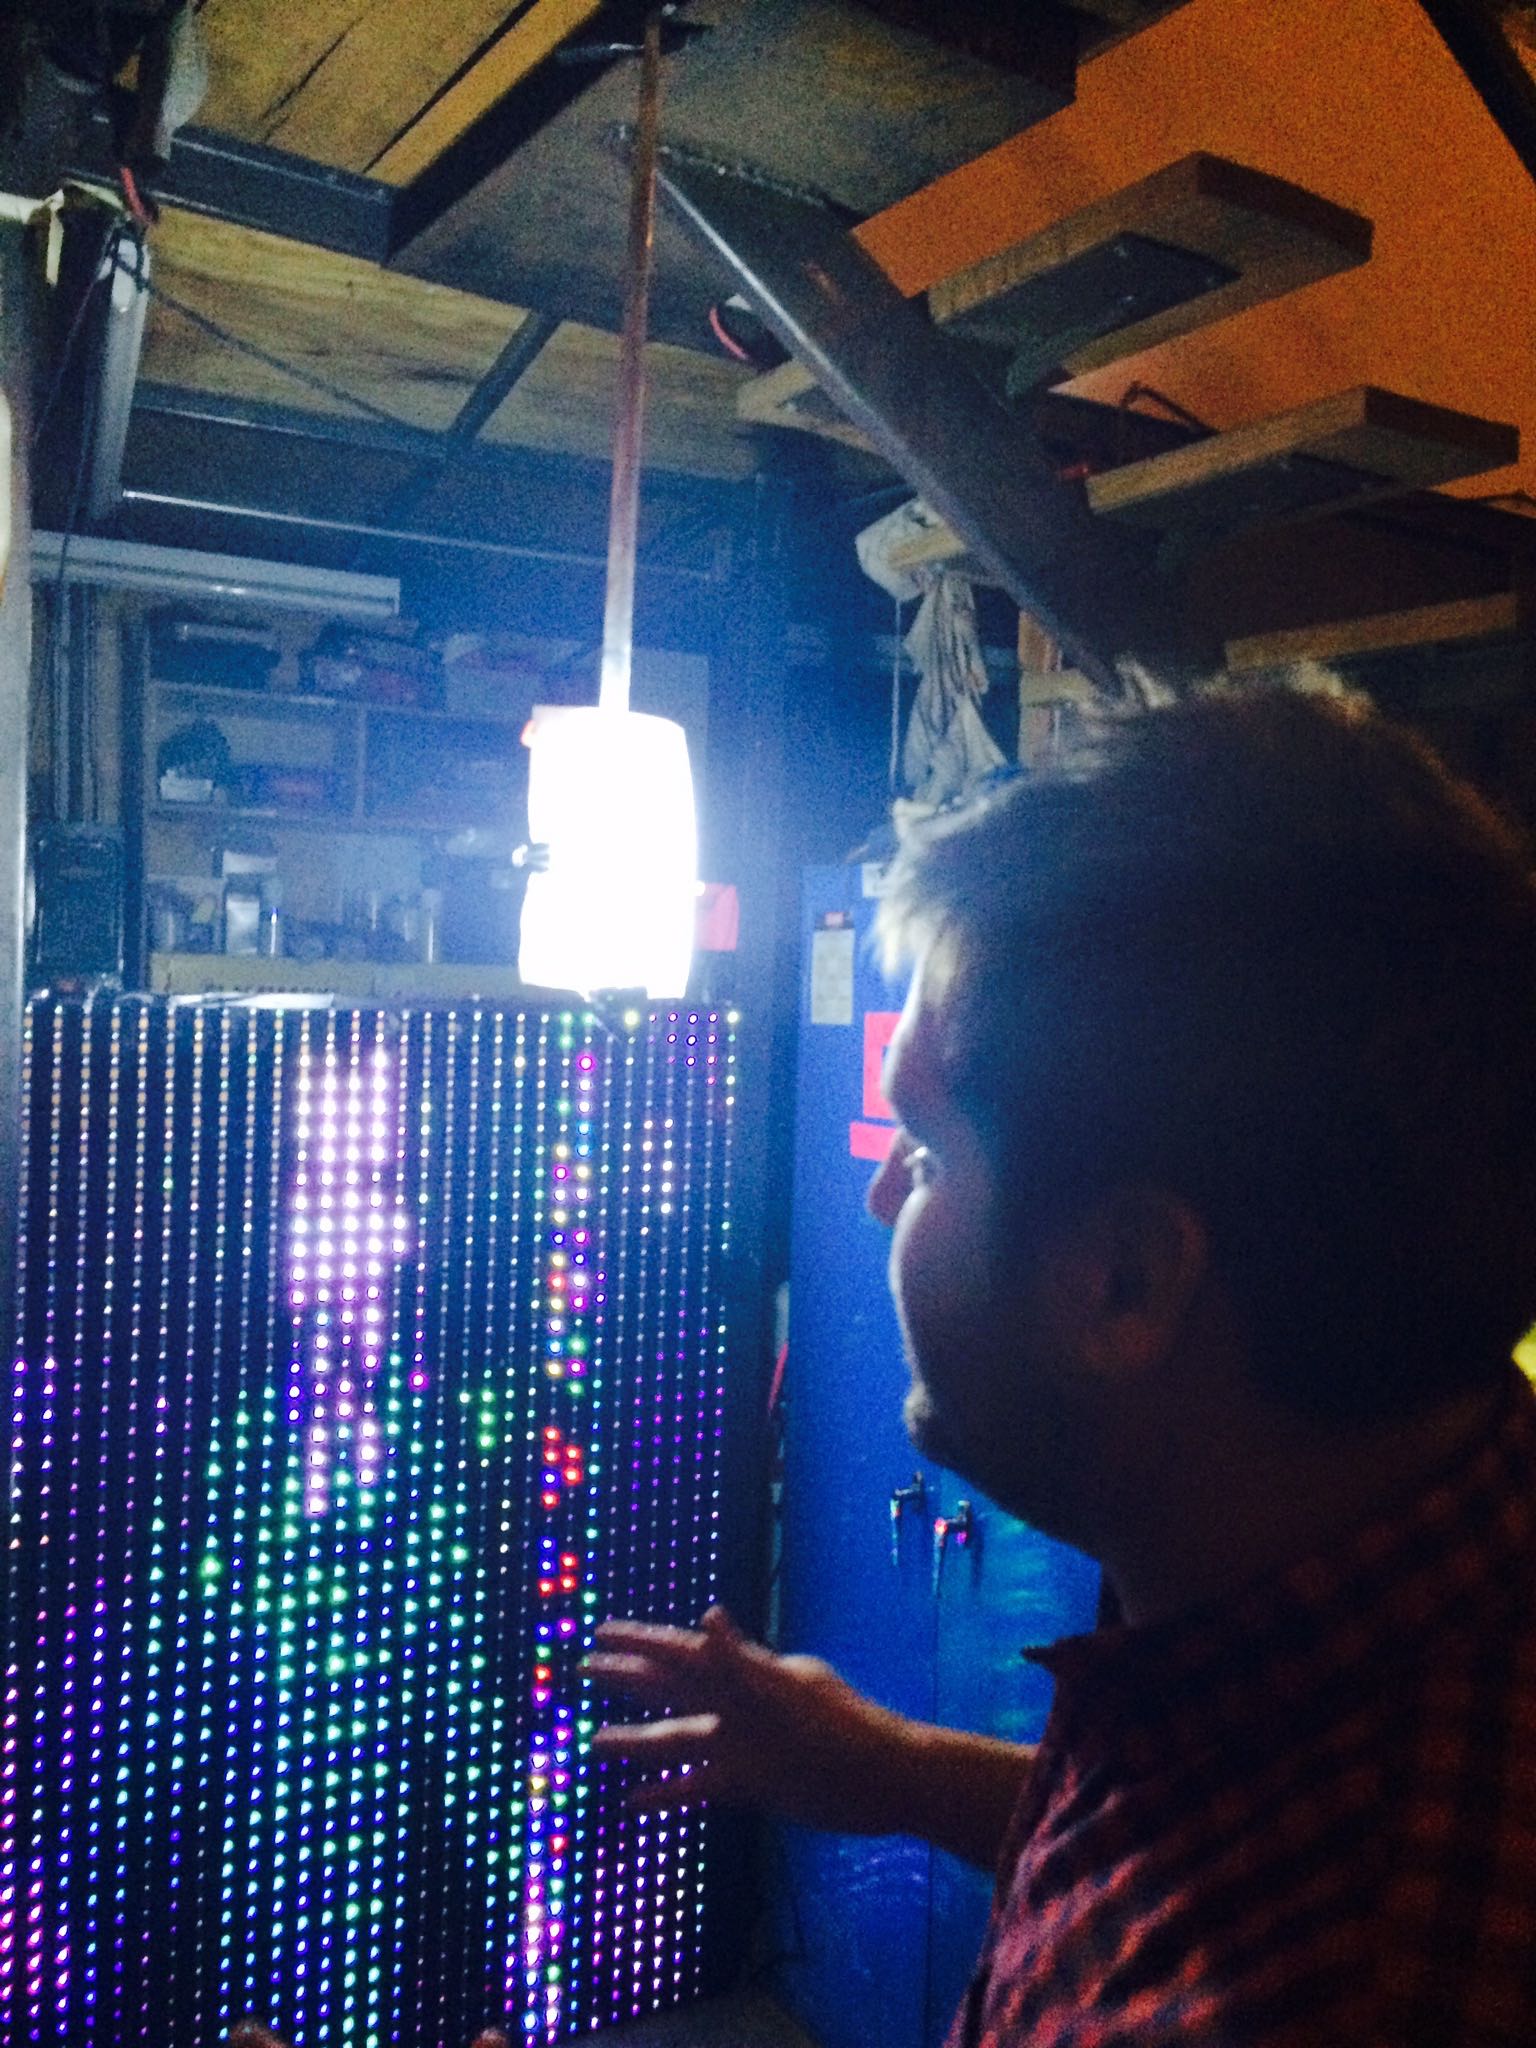
Pretty cool, huh? And people seemed to have fun with it:


(Full disclosure: the last ones are of me…)
Bonus: Rain Lights!
As I mentioned, I previously worked with Square Design to develop a series of LED strips that were to display an animated rain-like pattern. Controlled by Arduinos, the NeoPixels sent animated bursts of light at random speeds. The resulting effect was impressive:
For their holiday party, Square Design repurposed the lights to use as a backdrop for the band, which was even more impressive:
This was undeniably a fun challenge – I can’t wait for the next one!